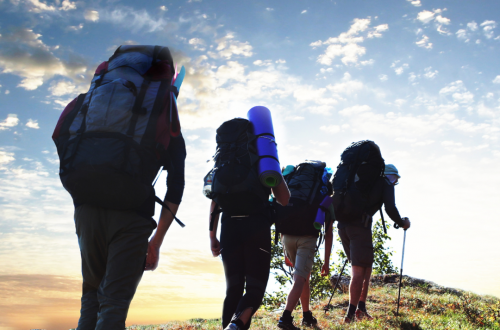
8 Tips for Travel Photos
Travel photography can be a daunting process when you’re not sure what to do in order to capture the images that you want. In this article, I’ve listed 8 tips for taking better travel photos so that you don’t miss out on these special moments.
1. Learn the Camera Settings
Before you even think about taking a picture, it’s important to understand how your camera works. Here are some basic settings that will help improve your photos:
Shutter Speed
This controls how long the camera sensor is exposed to light, which affects how blurry or clear your photo appears. A fast shutter speed (like 1/500th of a second) will produce a blurry image, while a slow shutter speed (like 30 seconds) will produce a clearer image.
Aperture
This controls the size of the hole in the lens through which light enters your camera. Aperture settings are usually expressed in f-stops (e.g., f/2.8), and they affect the depth of field as well as the amount of light that enters your camera.
ISO
ISO is basically just a measure of how sensitive your camera is to noise in light (also known as graininess). Higher ISOs will produce more noise in your photos, but they’ll also let you use shorter shutter speeds and larger apertures without having to worry about too much blur or bluish shadows appearing in your photos.
2. Ask for Help
Whether you’re struggling with your camera settings or just need someone to critique your shots, there’s always someone out there willing to lend a helping hand. Social media is a great place to find like-minded travelers and ask for feedback – whether it’s through tagging friends in your photos or posting them on travel forums.
3. Do your Travel Research
Before you even think about packing your camera, make sure you have a good understanding of the places you’re visiting. This means doing some online research and reading up on the culture, history, and attractions of the location. This will help you determine what photos to take and what angles to shoot them from.
4. Shoot in Natural Light
If you’re taking photos while traveling, chances are you’ll be shooting in natural light. And while there are a few tricks to get the most out of your photos in this setting, ultimately it comes down to getting good shots and knowing how to edit them later on.
One key thing to keep in mind when shooting in natural light is to avoid using too much flash. A lot of times, overly-bright lights can actually make things look artificial or harsh. Instead, try to use just enough flash to illuminate the subject without making everything else look too dark or washed out.
Another tip for shooting in natural light is to find a good spot for your camera. If you can find a spot where the sun is hitting the subject directly, you’ll get the most impressive results. However, if the weather isn’t cooperative and there’s not much sunlight available, don’t fret – you can still produce great photos by using proper lighting techniques and editing them afterward.
For example, if you’re using a tripod, try to position your camera so that the light is falling directly on the subject. This will give you some nice highlights and shadows without having too much glare from direct sunlight. Additionally, if you have a window behind your subject that’s letting in some natural light, try positioning your subject so that he or she is looking towards the window instead of straight ahead. This will add an extra layer of depth and interest to your photo.
5. Use a Wide Angle Lens
Use a wide angle lens to capture sweeping vistas or sprawling cityscapes. Often, a wider angle lens will provide more of a three-dimensional feel to your photos. This can help make your shots seem more realistic and interesting. Additionally, using a wide angle can compress large distances into smaller images, which can make for a more exciting photo essay or travelogue.
6. Shoot at a Longer Exposure Time
If you’re traveling and want to take photos that capture the feeling of your trip, shooting at a longer exposure time can help. Longer exposures tend to result in more depth of field, which means that objects in the foreground and background will be in focus. This can give your photos a more cohesive feel because it will create a sense of motion and atmosphere.
7. Shoot in Monochrome
If you’re looking to capture iconic images of your travels, shooting in monochrome can help achieve the look and feel you’re after. “Shooting in black and white makes for a more timeless photo that feels more like a piece of art,” says Noah Kowalski, founder of the travel photography blog The Photographer’s Ephemeris. “You can use this technique to create striking shots of architecture, landscapes, and people in interesting situations.”
To shoot in monochrome, start by setting your camera to manual mode and adjusting the ISO as needed. Next, make sure your shutter speed is fast enough to freeze motion. To prevent graininess or digital noise from appearing in your photos, it’s important to use a high-quality lens and shoot at a low aperture value (less than f/8). And finally, choose a black and white filter if desired to add an extra layer of depth and texture to your images.
8. Create Your Own Canon Lens Flare
Canon lens flare can add an interesting and unique dimension to your photos. Here are four tips for creating lens flare using Canon lenses:
Start With a Basic Concept
What kind of lens flare do you want to create? Do you want a natural look, or something more dramatic? Once you have a basic idea in mind, start altering the settings on your camera to achieve the look that you desire.
Consider the Angle of Your Light Source
If the light is coming from above or below your subject, it will cause different types of lens flares depending on where the light hit your camera sensor. Try experimenting with different angles and see which one produces the effect that you want.
Use a Gradient Filter
This is to add depth and dimension to your flare effects This will help to create a more realistic appearance, as well as add some flexibility in terms of how extreme the flare can be.
Play Around With Exposure Settings
Play around and see what gives you the best results overall. There is no one “right” way to create lens flare, so experiment until you find something that works best for your photos!


You May Also Like
Environmental & Social Impacts of Travel
YouTube Travel Videos: 10 Best Vlogging Channels to Follow